Should You Use a Lightbox For Photography?
Do your photographs tend to turn out too dark, even when you’re using a flash? Are there distracting shadows that accompany your image that take away from what you’re trying to say? To create the perfect portrait of virtually any object, a lightbox is an effective and affordable solution. You can make a lightbox in just a few moments and it will create the perfect type of image that you want… with or without shadows.
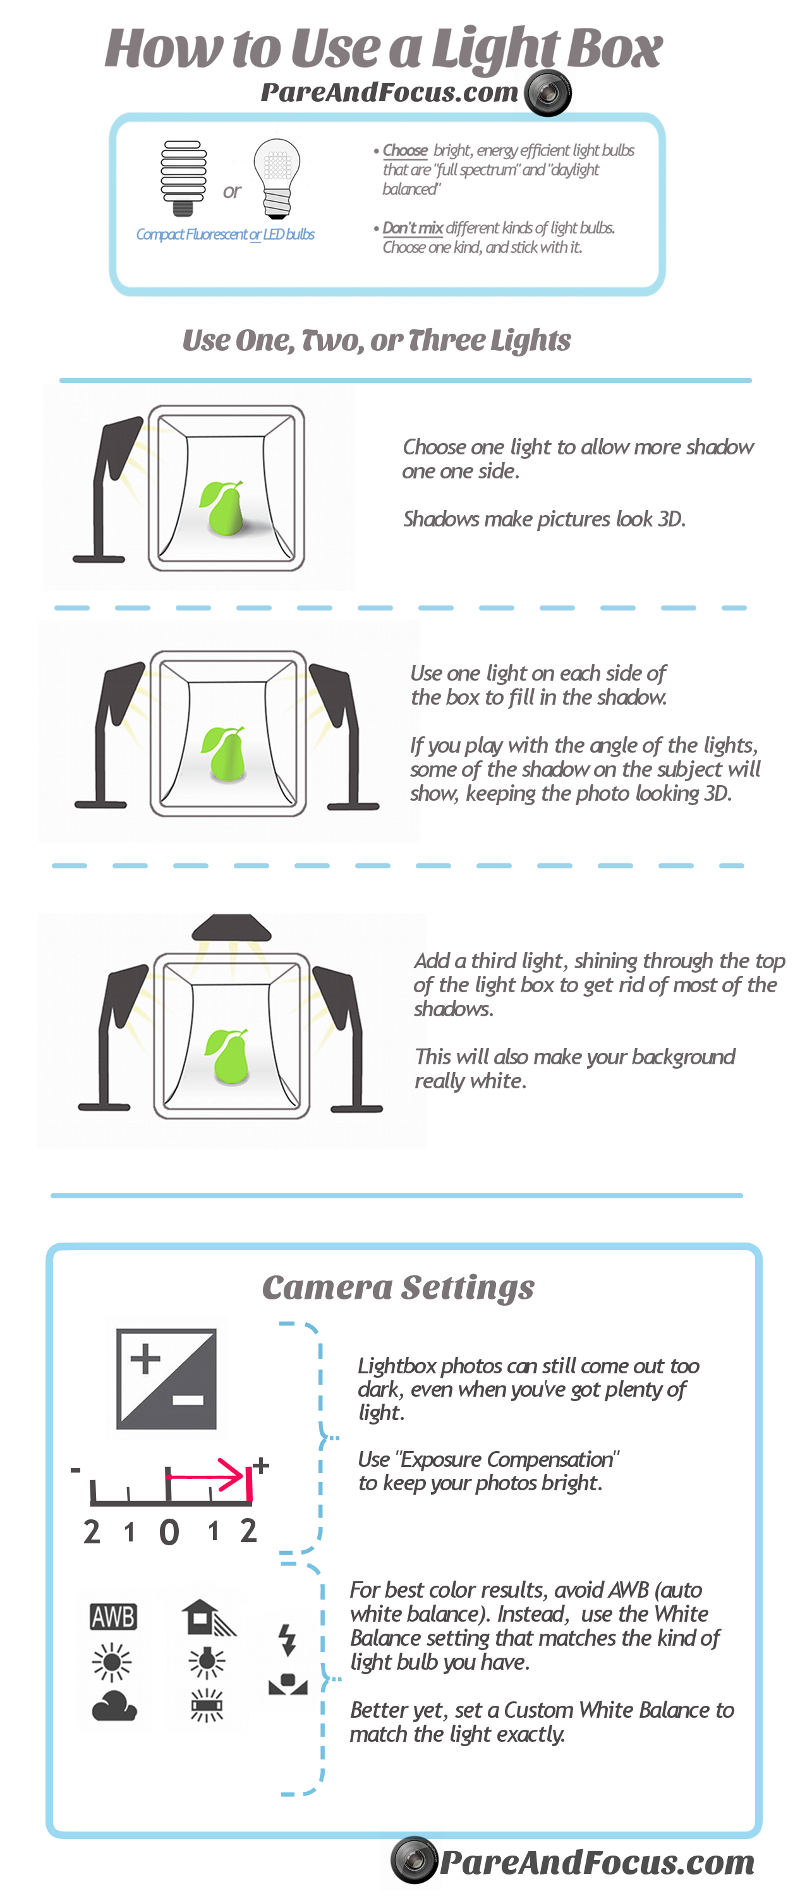
You Can Use 1, 2, or Even 3 Lights in a Lightbox
The type of image you’re trying to get is what dictates how many lights you use in your lightbox. You can use virtually any type of light – LED lightbulbs or compact fluorescents work the best to give you a true image, but even incandescents can work in a pinch. Whatever light you choose, just stick to that kind of light. Don’t mix LEDs with fluorescents, for example.
1. Light Lightboxes: If you want shadows of your object to be primarily on one side of the object your photographing, then choose 1 light for your lightbox. This will give your image some added depth because it creates an almost 3D effect within the photograph.
2. Light Lightboxes: If you use one light on each side of the lightbox, you’ll eliminate many of the shadows while still being able to catch some of that depth within the photograph. This is because there will still be a slight shadow cast underneath and behind the object. You may need to adjust the placement of the lights and the object within the box to get the perfect effect.
3. Light Lightboxes: To get that classic white background for a colorful object, consider using three lights for your lightbox. A light installed on the top of the box with two lights shining in from the sides is an easy way to create this effect.
You May Need To Adjust Your Camera As Well
Each camera is unique, so just because you’ve eliminated the shadows from the base image in the lightbox doesn’t mean that your camera will produce the same image your eyes see. Images can often be dark, which means you’ll need to adjust the exposure compensation settings on your camera. Avoid using automatic settings as well, especially the “Auto White Balance” setting that some cameras have. If anything, use the white balance settings on your camera that match the kind of lights you used in your lightbox.
Always Take the Perfect Picture!
Whether you just need the image for promotional purposes or you are a professional artist creating portraits, a lightbox can help you give any object added depth so that you create the perfect photograph. Use these tips to create your own lightbox so that your image can really stand out from the crowd. That way the focus will be on what you need to say… instead of being on the quality of the image that you took.
Although millions of people visit Brandon's blog each month, his path to success was not easy. Go here to read his incredible story, "From Disabled and $500k in Debt to a Pro Blogger with 5 Million Monthly Visitors." If you want to send Brandon a quick message, then visit his contact page here.